
Understanding MCP Architecture: LLM + API vs Model Context Protocol
Suppose you want a chatbot that works with PDFs: extract text, search across documents, summarize sections….

Suppose you want a chatbot that works with PDFs: extract text, search across documents, summarize sections….

Choose Anker Prime DL7400 Docking Station for triple display:https://ankerfast.club/j5owh3Also, Anker is running a fun “Where’s Prime…

Best design tools and resources are those that can lay claim to characteristics that typically include…

WPVibe launched on WordPress.org, and with it, something genuinely new: the ability to manage your entire…

Users hate Windows 11 and behind the scenes Microsoft know it as well, and are working…

WordPress Student Clubs are beginning to take shape as a new way to carry the momentum…

The bottom line: Astronauts likely won’t exceed Artemis II’s distance from Earth on most lunar landing…

The Problem With How We’re Sending Data to AI Models Most Java applications that integrate with…

Check out TryHackMe: https://tryhackme.com/SamtimeUse codeword SAM25 for 25% off their annual Premium plan! Was Windows XP…

If you run a WooCommerce store, then you’ve probably heard that ChatGPT now lets users shop…
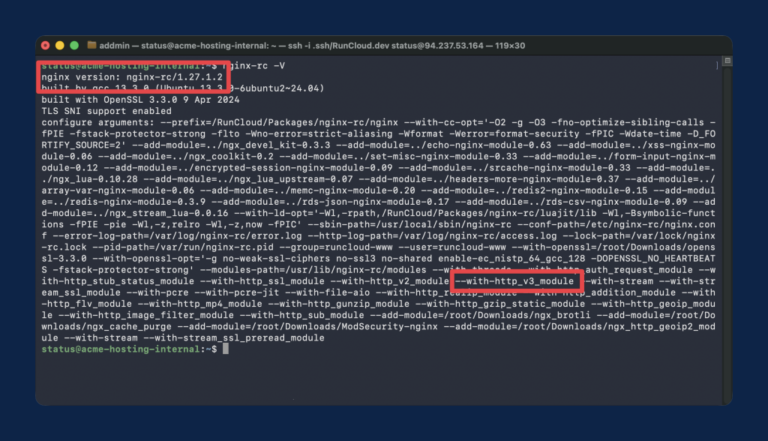
If you’re running NGINX on a modern server, you’re likely leaving performance on the table by…

Tim Cook is stepping down as CEO of Apple and is being replaced by Craig Fegerig……

Most AI comparisons stay stuck at the surface—benchmarks, speed tests, or who writes the better tweet….

This will disrupt ecosystems as mesotherms are typically apex predators that exert disproportionate control on species…
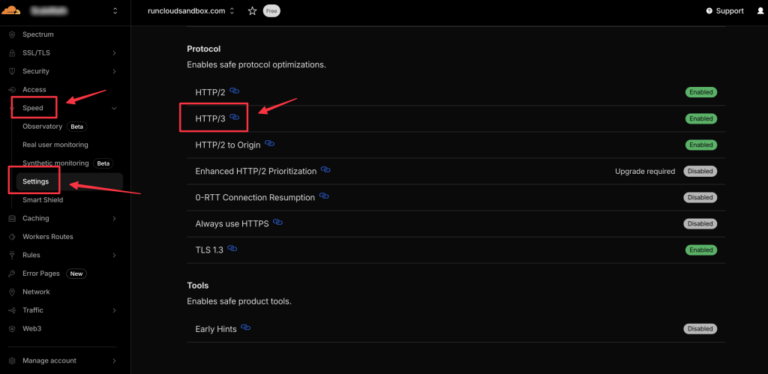
Most modern websites use the HTTP/2 protocol, which uses multiplexing to send multiple files over a…