In this part of the series, we will proceed with the VCF fleet deployment via the VCF Installer appliance.
The VCF Installer appliance replaces the Cloud Builder appliance used in prior VCF 5.x versions. It simplifies the deployment of an end-to-end private cloud environment in a wizard-based fashion rather than relying on excel sheets in prior VCF 5.x versions.
From VCF 9, the VCF Installer appliance is used to deploy the full VCF stack comprising of compute, storage, networking, operations and self-service automation and VCF Operations is used to lifecycle manage the full stack. Once the software binaries have been downloaded, the same appliance can be used to deploy VMware Cloud Foundation (VCF) or VMware vSphere Foundation (VVF).
VCF 9.x can be deployed using a Simple (single node) appliance model or a High Availability appliance model.
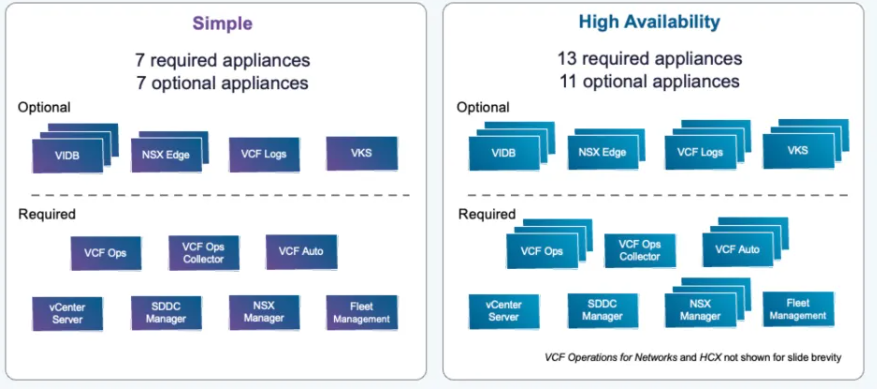
When choosing a Simple Model a minimum of 7 appliances are required. These consist of a single appliance for vCenter server, SDDC Manager and NSX Manager. VCF Operations comprises of single appliances for VCF Operations Manager, a Fleet Management appliance and a VCF Operations collector. A single appliance is also deployed for VCF Automation. When the supervisor option is selected a vSphere Kubernetes Services (VKS) appliance is deployed.
When deployed using the High Availability model a minimum of 13 appliances are deployed comprising of 3x NSX Manager nodes, 3x VCF Operations nodes and 3x VCF Automation nodes. 3x appliances are also configured for VCF Operations for Logs and VKS.
In my lab environment and due to resources constraints, I will be deploying VCF 9.0.1 in the simple model. A High Availability Model is recommended for production environments.
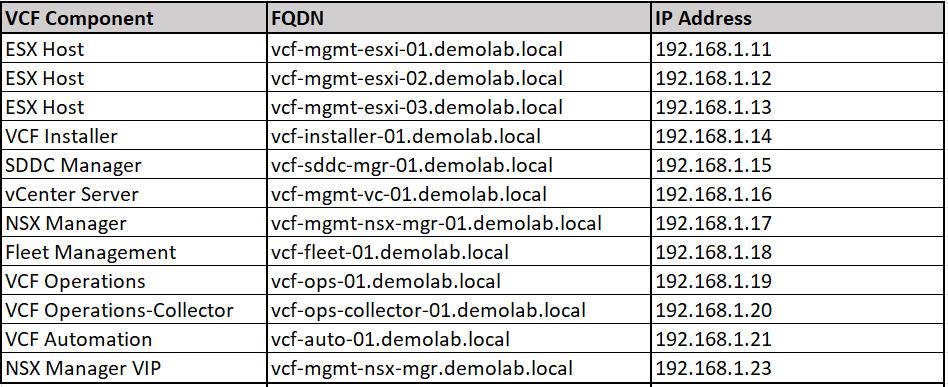
Reminder !! Create DNS records for all VCF Components
In the previous posts of this series, we have already created the necessary DNS records for ESX hosts and VCF Installer appliance. Below is a table with all components and the required A/PTR DNS records.
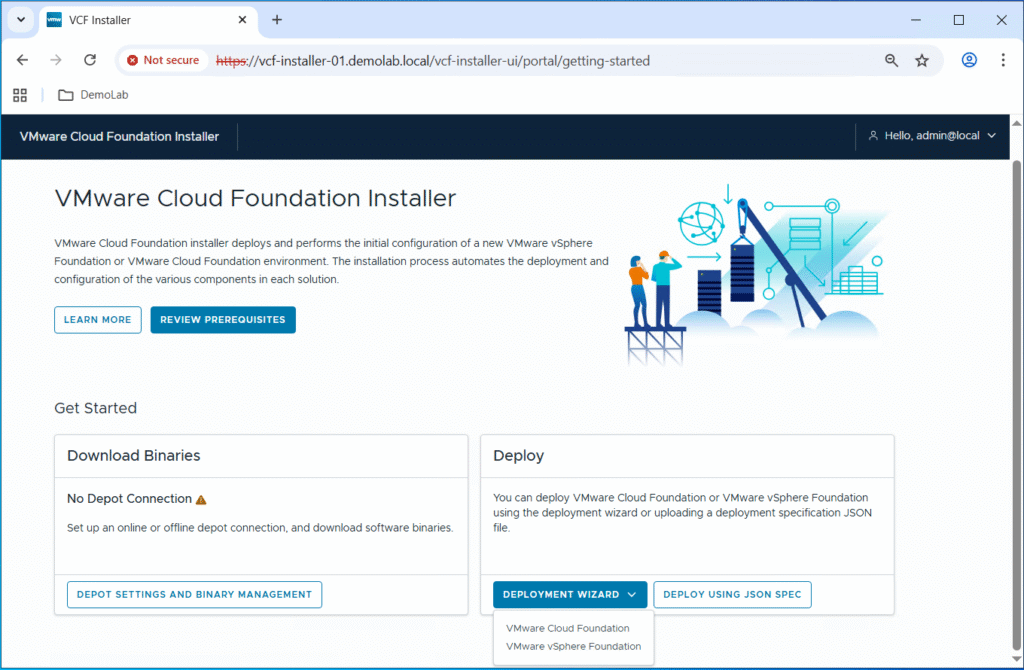
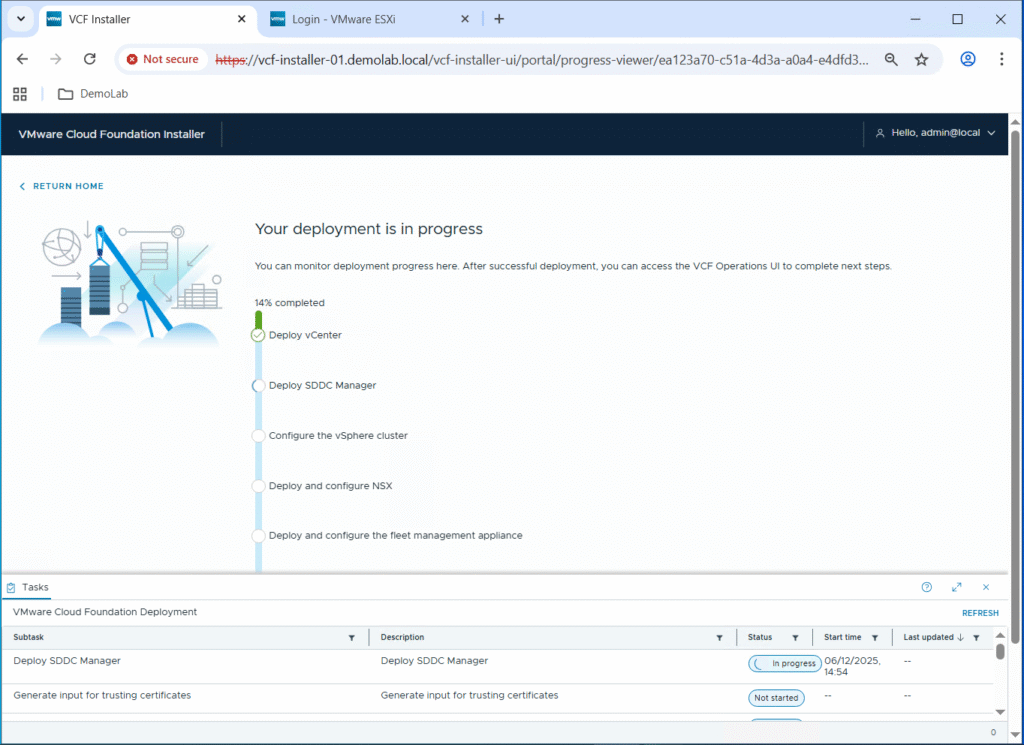
VCF Fleet Deployment
Login to the VCF installer appliance using admin@local account, then choose VMware Cloud Foundation from the Deployment Wizard drop down menu.
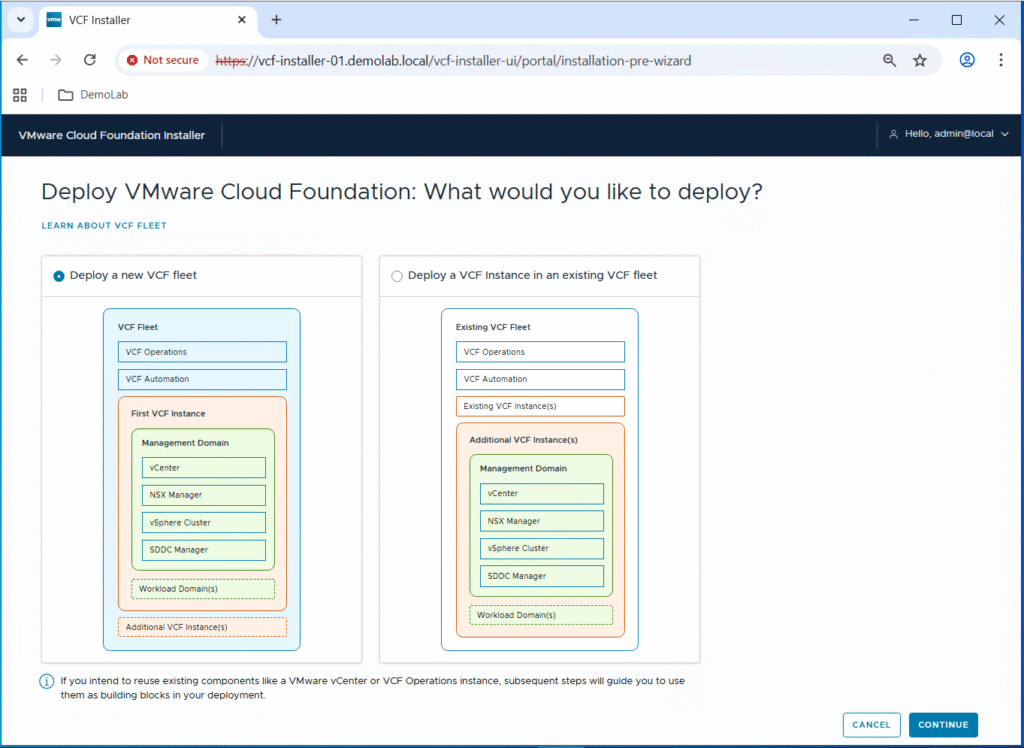
As we are performing a green-field deployment from scratch, we will select “Deploy a new VCF fleet” and then click on Continue.
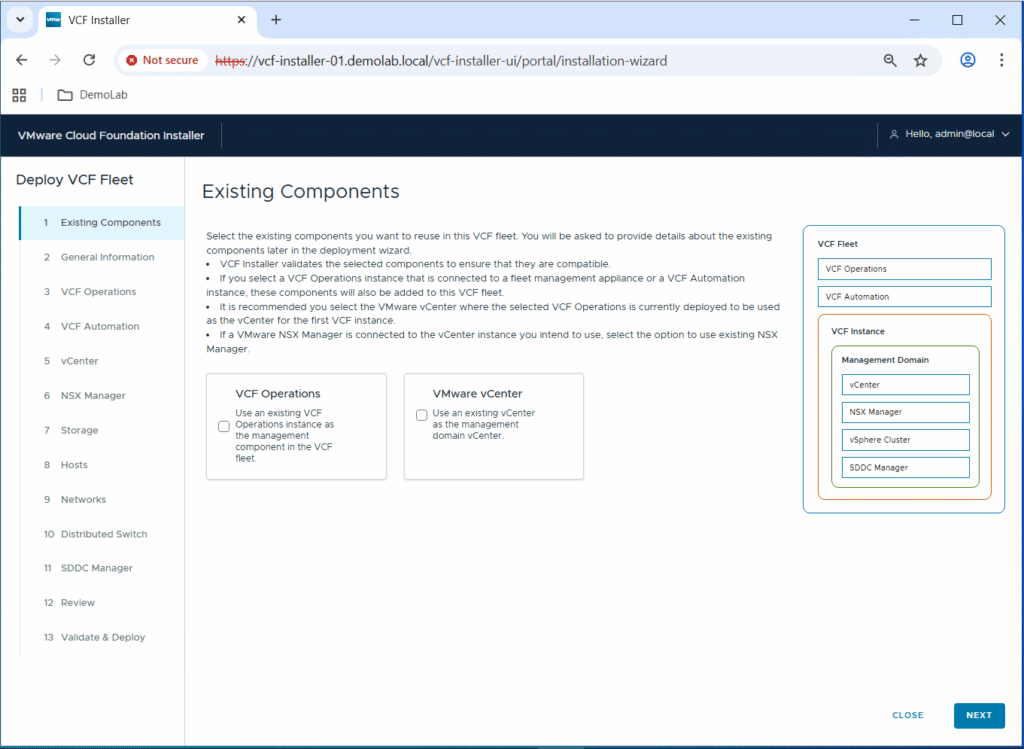
We will not reuse any existing VCF Operations or vCenter server components. Click Next.
Enter a name for the VCF instance and management domain.
Select “Simple (Single-node)” for the deployment model.
Enter the DNS domain name, and DNS/NTP servers FQDN names or IP addresses.
Click Next.

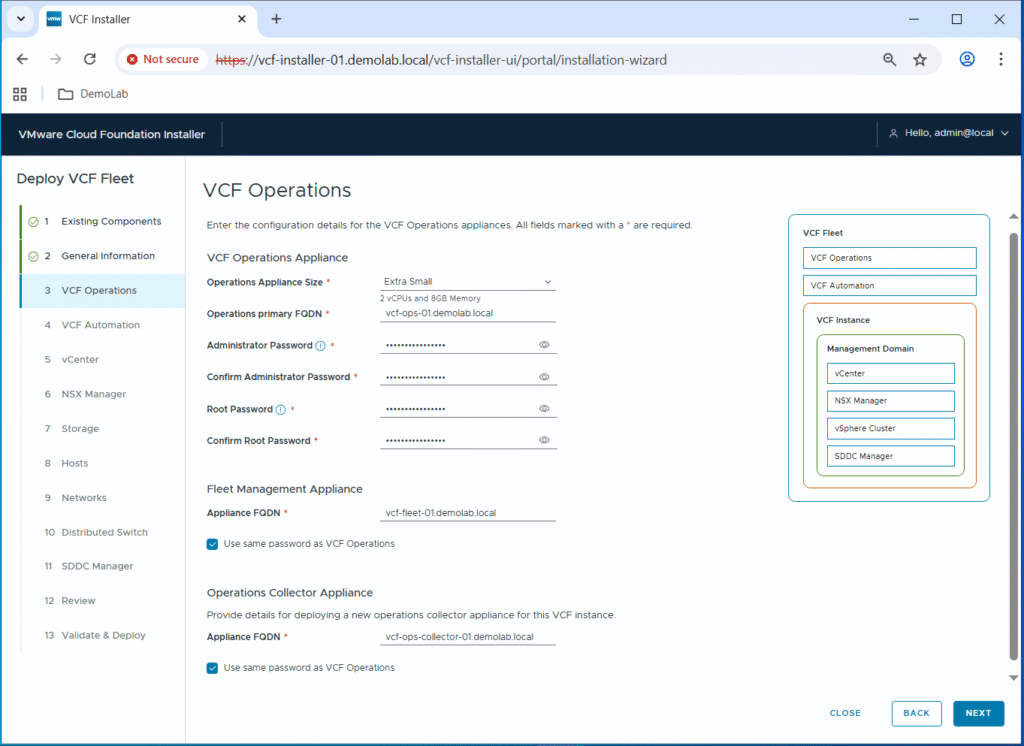
Select the size of the VCF Operations appliance.
Enter the FQDN for VCF Operations, VCF Operations Collector, and Fleet Management appliances.
Fill the password for Administrator & Root accounts. In my lab I am using the same password for all appliances, so I checked the “Use same password as VCF Operations” option.
Click Next.
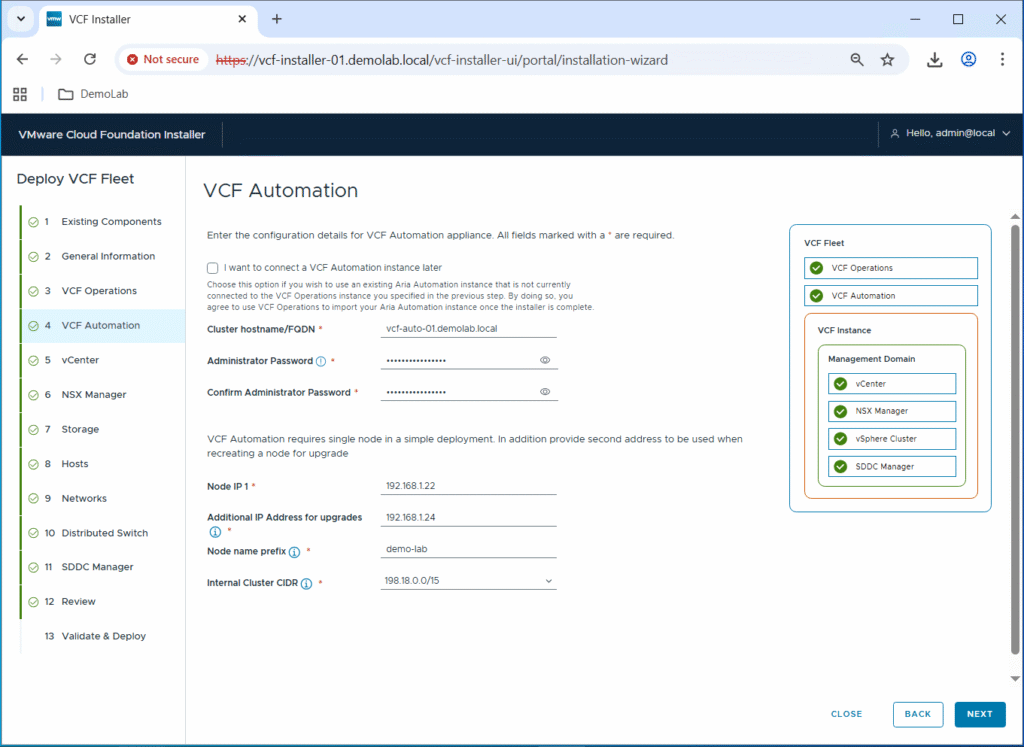
Enter the Administrator password, and IP address for the VCF Automation appliance. Notice that it asks for an additional IP address that is will be used temporarily during upgrades. In addition, specify a Node Name Prefix that will be prepended to all node names.
Note that for Cluster hostname/FQDN, you have to specify the VCFA VIP FQDN and not the FQDN of the VCFA node itself. If you do so, the deployment will fail.
https://knowledge.broadcom.com/external/article/406806/vcfa-deployment-using-vcf-installer-fail.html
I am going to leave the Internal Cluster CIDR for Automation Kubernetes Pods as default. Click Next.
Enter the MGMT domain vCenter server configuration details: FQDN, Size, SSO domain name, Administrator/Root passwords, … Click Next.

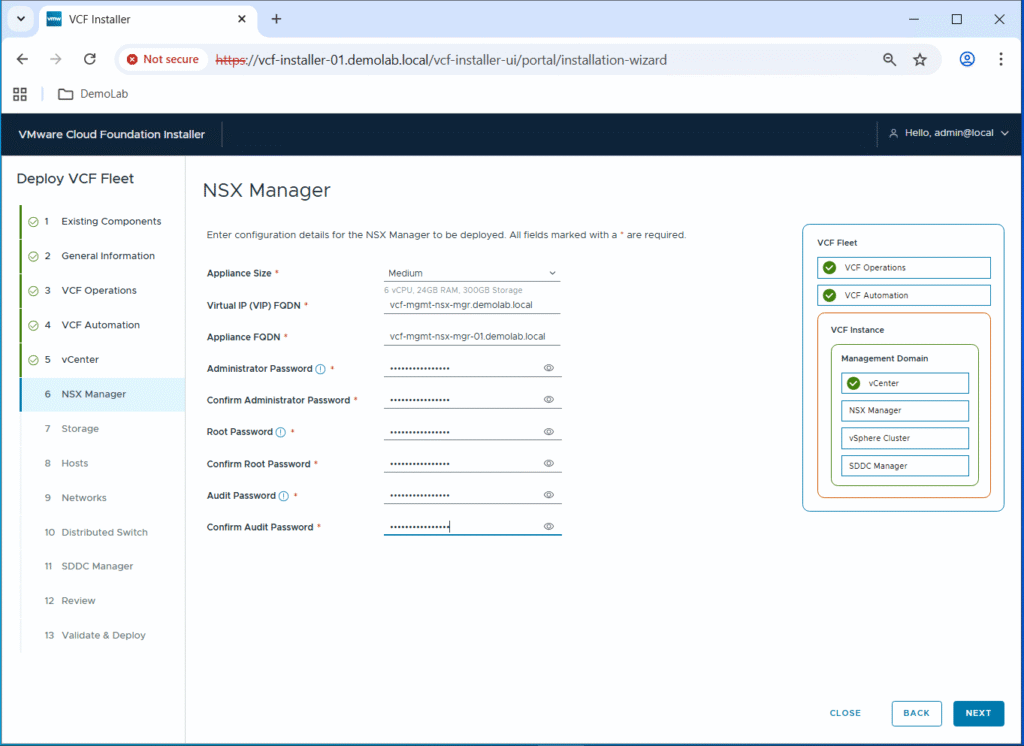
Enter the MGMT domain NSX manager configuration details: Size, FQDN, Administrator/Root/Audit passwords. Notice that it asks for VIP FQDN as well although we are deploying a single NSX manager using the Simple deployment mode. Click Next.
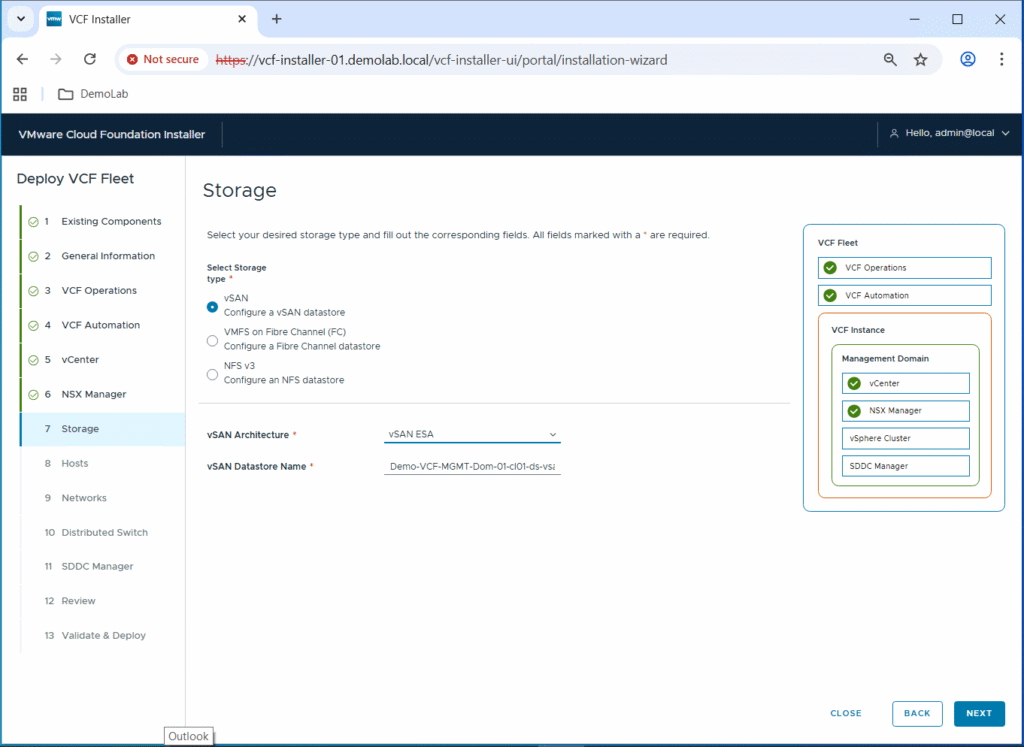
For the storage layer, I am going to use vSAN ESA for my management domain, so I will select vSAN from the three storage types, and vSAN ESA as the vSAN Architecture. In addition, provide a name for the vSAN datastore and click Next.
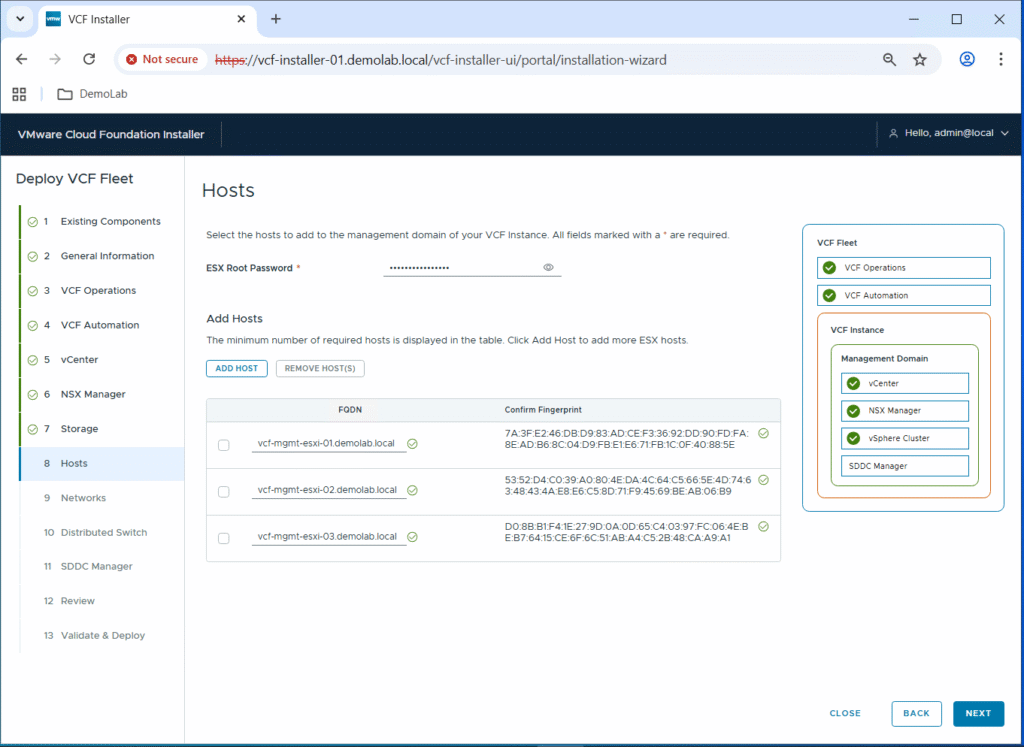
Add the three MGMT domain ESX hosts by their FQDN names, and confirm their fingerprints. Fill the ESX root password and click Next.
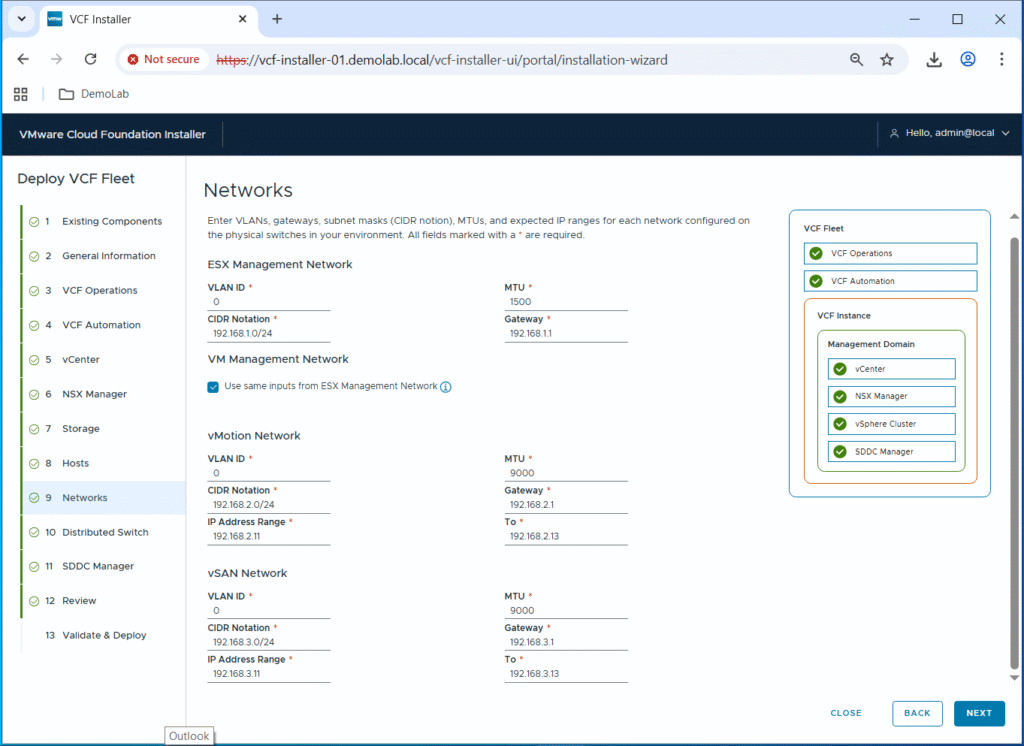
Enter the VLAN ID, MTU, CIDR and gateway for ESX Management, VM MGMT, vMotion, and vSAN networks. In addition, enter IP address ranges for vMotion and vSAN networks. vMotion and vSAN VMKernel ports will be assigned IP addresses during the bringup process from these IP address ranges.
Click Next.
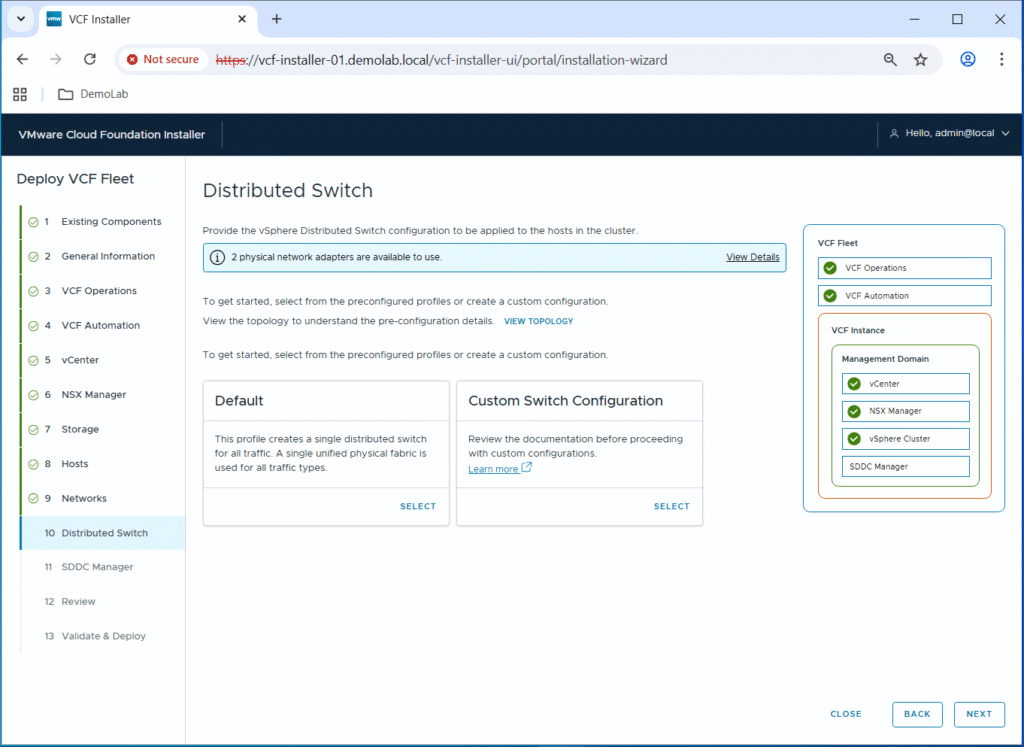
As I have only 2 NICs per ESX host, I am going to select the Default profile for the VDS switch. This profile creates a single distributed switch for all traffic (ESX management, VM management, vMotion, vSAN, NSX, …).
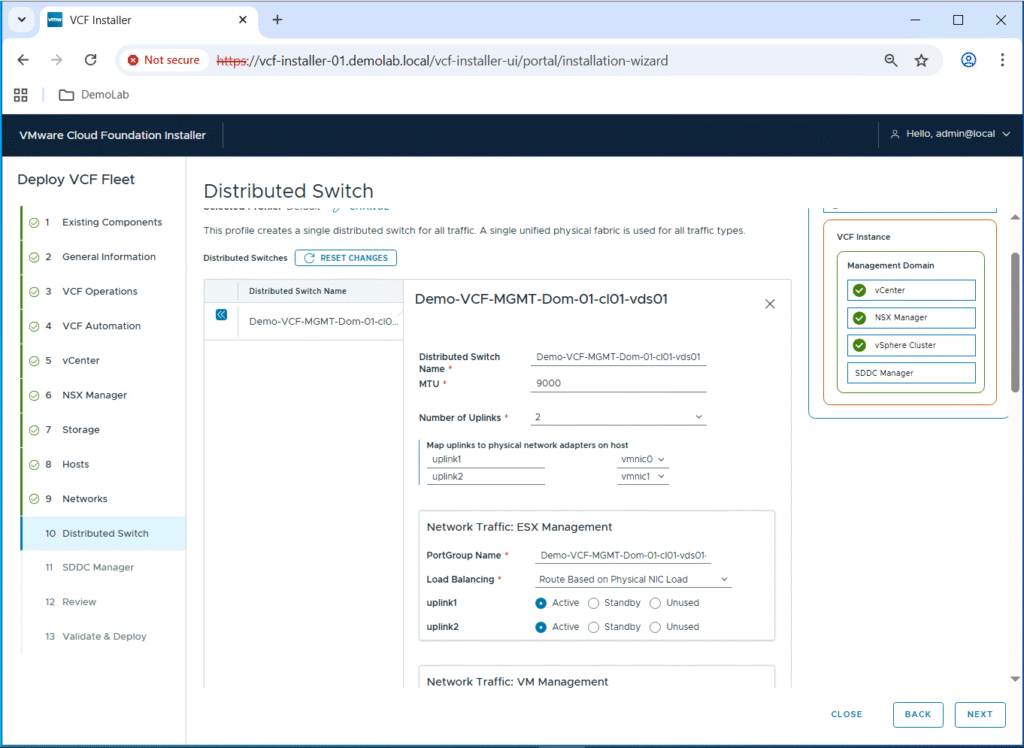
Then you will need to click on the VDS switch to configure its name, MTU, and uplinks. In addition, you can configure the portgroup name, load balancing and uplinks for each type of traffic.
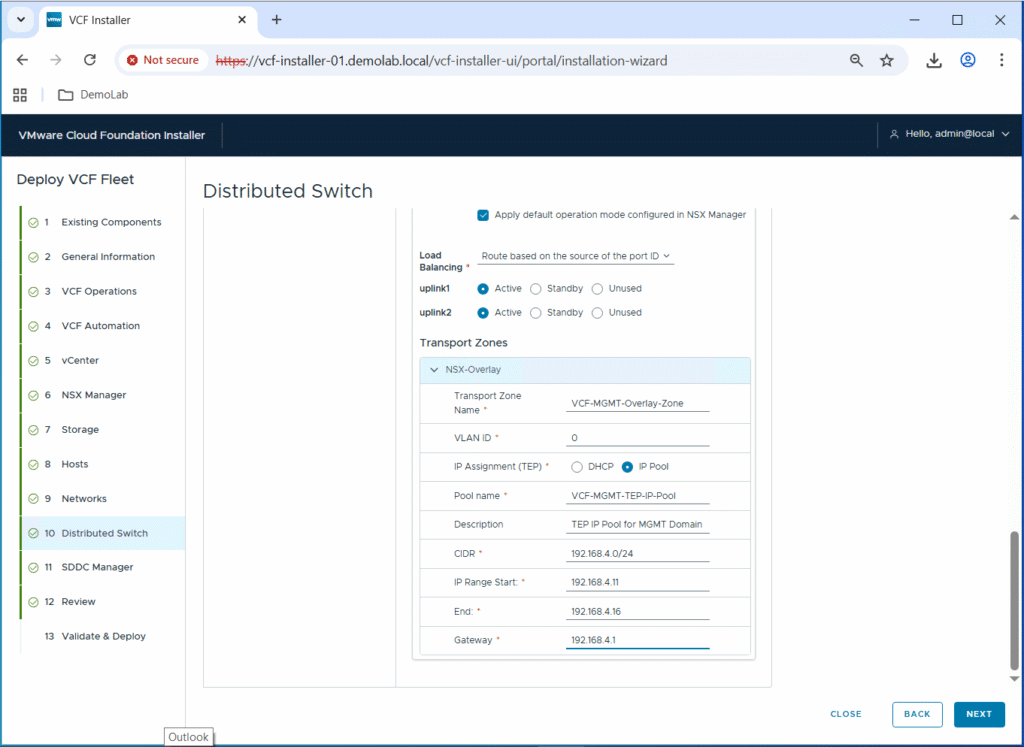
For NSX, you will need to configure the NSX overlay transport zone, along with the TEP IP pool, and IP address range.
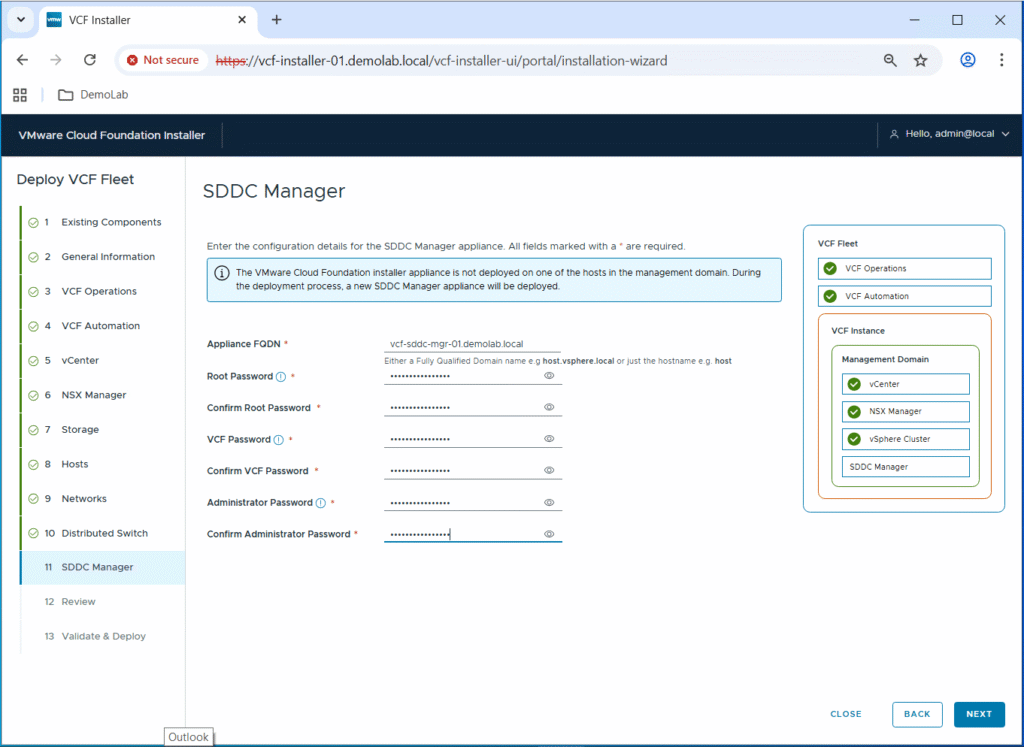
Now you will need to enter the configuration details of the SDDC manager appliance: FQDN, Administrator/Root/VCF passwords. Click Next.
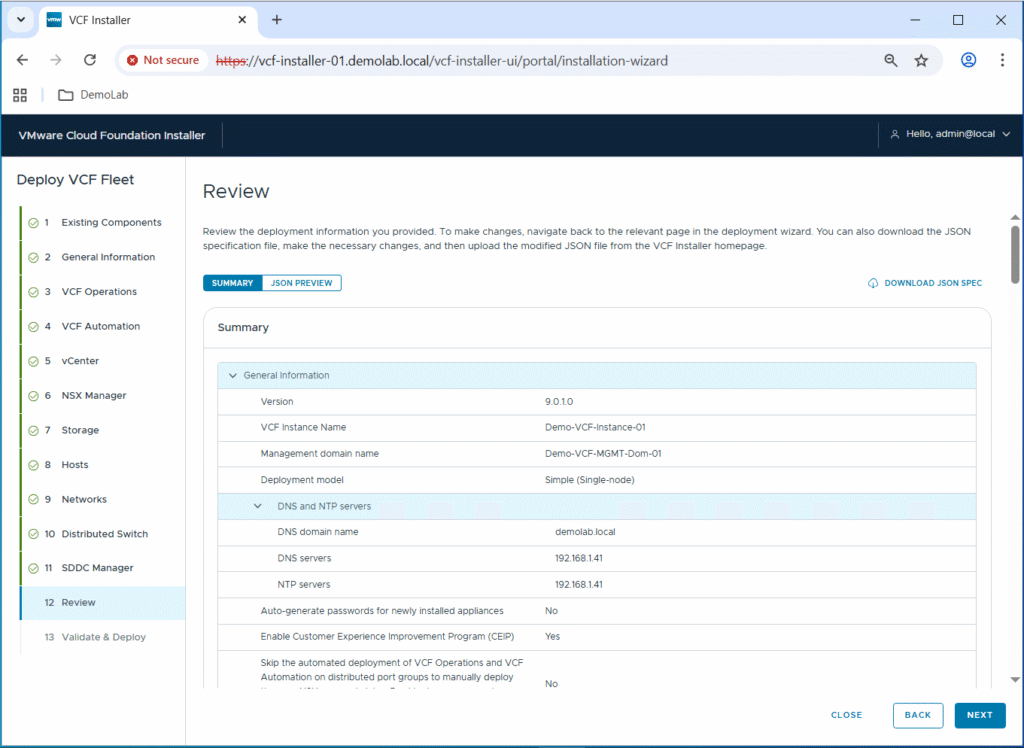
Review the configuration. Notice that you can download JSON SPEC file that can be imported to be reused for a similar VCF deployment or further customization. Click Next to start the validation.
I got some warnings during the validation due to the fact that vSAN and vMotion gateways can’t be reached but this can be acknowledged in my lab as I am using dummy subnets for internal communication of such traffic types. In real production environments, a separate VLAN and subnet should be created for each traffic type.
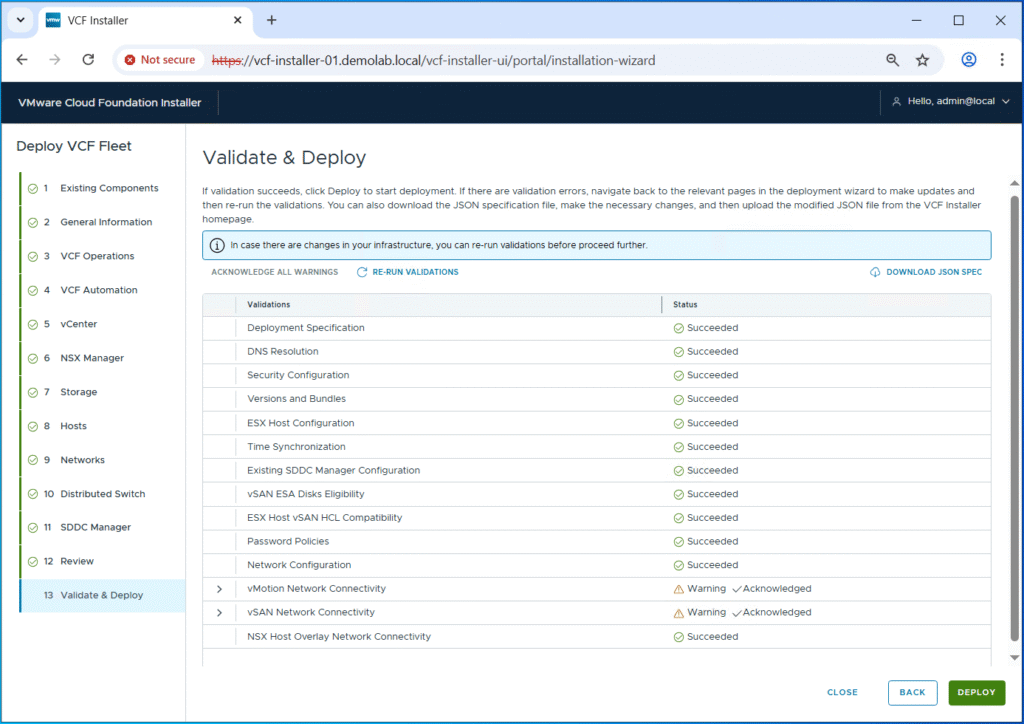
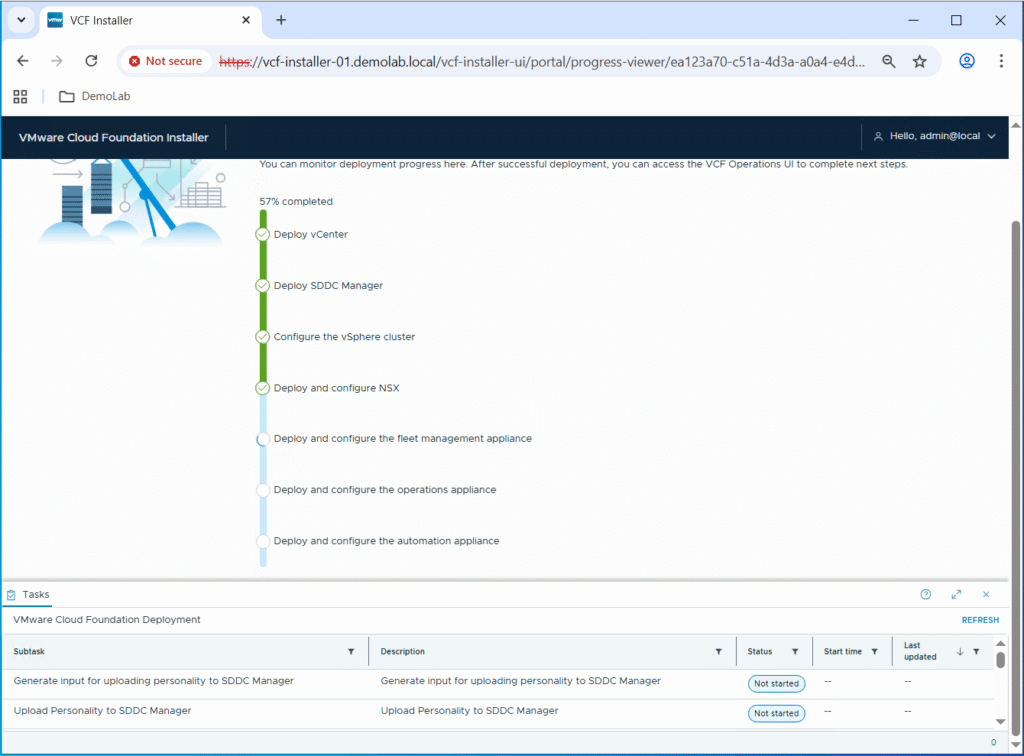
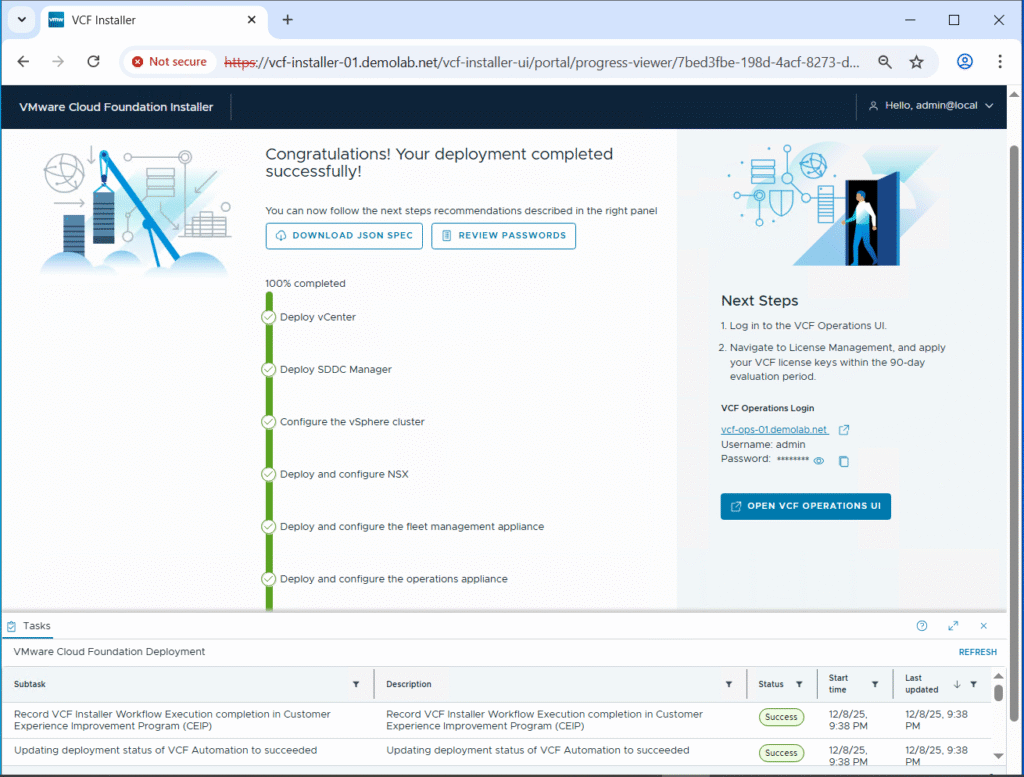
Once validation is done, click Deploy to start the VCF fleet deployment.

I got the below error at the last step of deploying the VCF Automation appliance:
Request createenvironment failed with error cause [{“messageId”:”LCMVSPHERECONFIG1000095″,”message”:”LCMVSPHERECONFIG1000095″,”eventId”:”15f9f52c-417b-4d84-b492-01dd546d5c5c”,”retry”:true,”exceptionMessage”:”Failed to create services platform cluster. Refer to /var/log/vrlcm/vmsp_bootstrap_xxxxx.log for more details.
As per the below recent article from Broadcom, this is something expected when using a .local domain, and the resolution is: Re-deploy the VCF environment using a different domain (not “.local”).
https://knowledge.broadcom.com/external/article/413394/vcf-automation-fails-to-install-in-a-loc.html
I did the whole VCF redeployment again using domain demolab.net this time instead of demolab.local, and the VCF automation deployment went fine as part of the full VCF 9.0.1 fleet deployment.
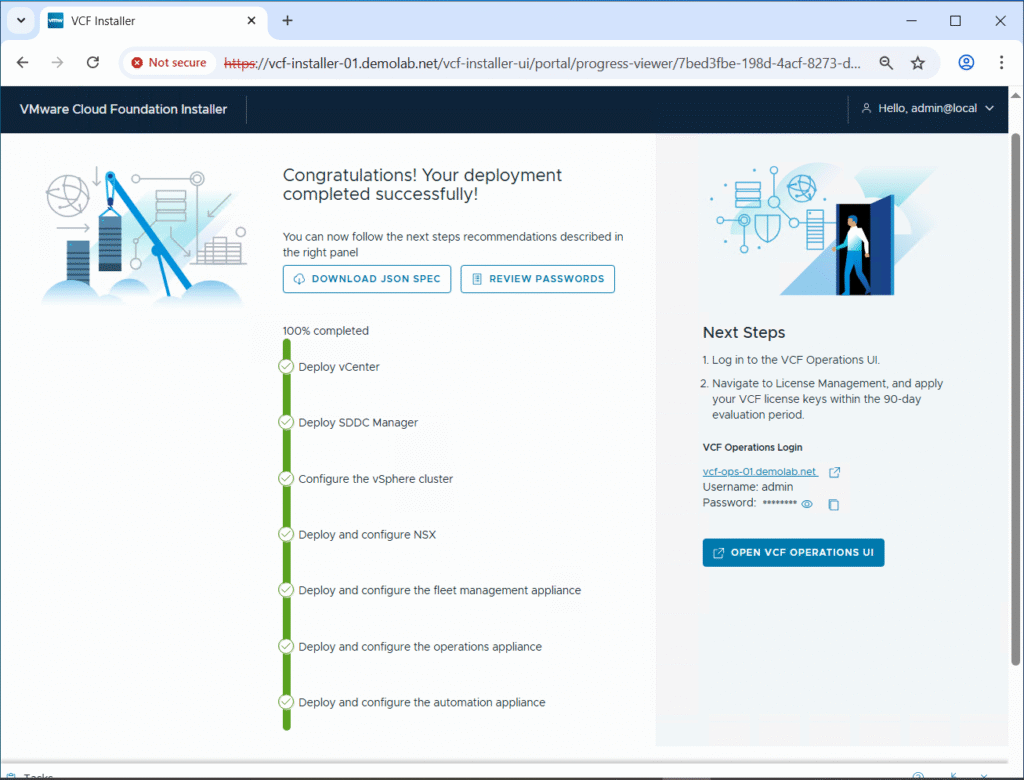
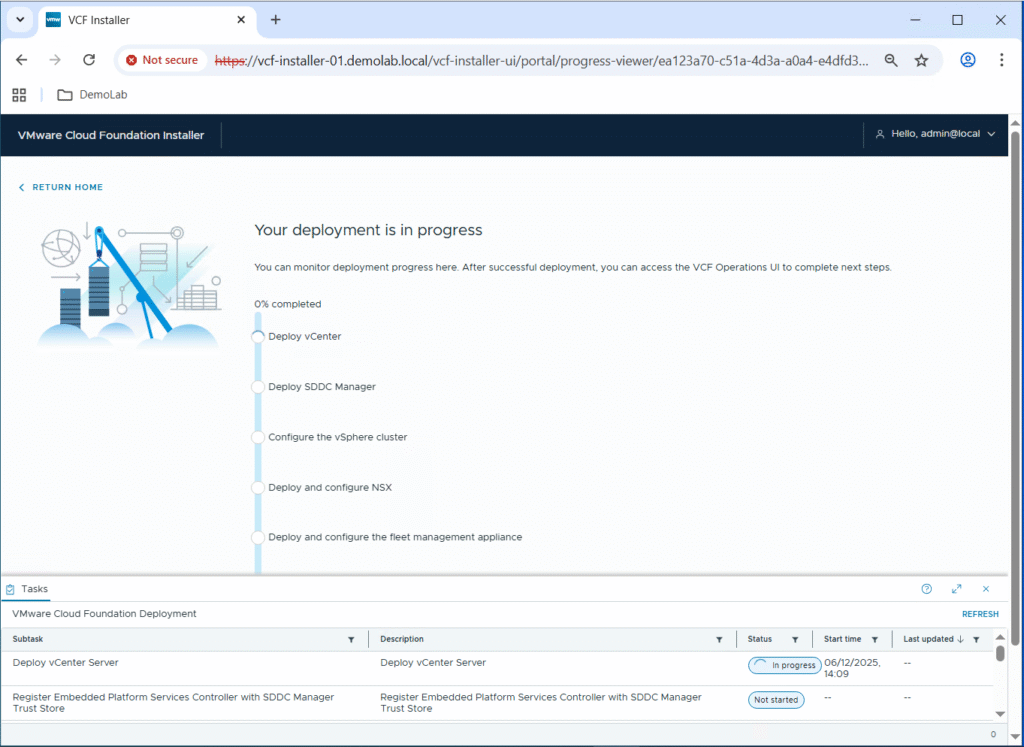
The full deployment took around 8 hours in my nested lab.
Hopefully this post is informative,
Stay tuned for more VCF posts!!
Many thanks for reading,
 (1 votes, average: 5.00 out of 5)
![]() Loading…
Loading…